slideyfoot.com | bjj resources

 Home
 Contact
 Reviews
 BJJ FAQ  Academy

This website is about Brazilian jiu jitsu (BJJ). I'm a black belt who started in 2006, teaching and training at Artemis BJJ in Bristol, UK. All content ©Can Sönmez

30 July 2013

30/07/2013 - Teaching (Ezequiel Choke to Americana from Mount)

Teaching #116
Gracie Barra Bristol, (BJJ), Can Sönmez, Bristol, UK - 30/07/2013

Today I wanted to look into attacking from mount. I feel relatively comfortable maintaining the position, particularly in low mount, but I struggle to get any kind of submissions from there. The main two I attempt are the ezequiel choke (which I've taught once before) and the americana, so that's what I wanted to focus on today. The main thing I like about the ezequiel choke (often spelled as Ezekiel: the reason I normally spell it Ezequiel is because that's the guy who it was named after, as explained here) is that you can do it from what I think is the strongest controlling mount, where you're low with your feet tucked under their bum and an arm under their head. The difficulty I tend to have is getting my choking hand through, as they can normally see what is happening and block it, or are simply staying too tight and defensive in the first place.

Dónal's solution was going for that ezequiel choke (sometimes also spelled ezekiel) as soon as you land in mount (a quick point on that: bring your head further out towards your basing arm to increase your top pressure). When your arm goes under their head, block their view with your own head, keeping three fingers extended on the reaching under hand. Those are going to shoot inside your other sleeve: because you're only using three fingers rather than four, you've increased your reach. Bring your sleeve arm through across their neck, then pull your three-finger hand elbow across as well (a tip from Caio Terra, apparently). From there, complete the choke as usual, doing a motion like you're attempting to decapitate them.

Saulo teaches it a little differently. He assumes they will have their arms in and elbow to their side. First, swims past one of their arms, digging underneath their forearm and pushing past to their shoulder. As soon as you gets your elbow to the mat, drag it back to clear their arm out of the way. Immediately fill up any space by dropping your shoulder: if they can get a hand inside, they can defend.

Get your other arm to the mat in the same way, again clearing their arm by dragging your elbow back. This time, also put your head next to theirs, both blocking their view and removing more space. Put your choking hand by your head in readiness. When the time is right, lift your head just enough to insert your hand, shoving it through straight away, then finishing off the choke.

If as often happens they block your hand coming across, you can flow into the americana. In order to block, they will tend to cover by their jaw with their opposite hand. To do that, they will invariably raise their elbow. That's you chance to shove your knee into that space. Usually I slide up, to stay tight. Dónal does it differently: rather than sliding, go slightly on your toes, then drive your knee and hip straight in. This is faster and more powerful. Keep driving your knee inwards to really squash their arm into their face.

Your other leg also shoots up, putting their other arm in a similar position. This is very uncomfortable and doesn't leave them with many options. A common last-ditch escape they might try is bringing their legs right up into your armpits. If they try that, drop your shoulder, which should help unless they're incredibly flexible.

Due to the way their arms are tangled up, you may be able to get a wristlock (especially if their hand is bent into the mat at an awkward angle: just apply gradual pressure to their elbow), or an americana. Dónal normally does the typical paintbrush from here, but because of the position, I bent it against my leg instead, more like a kimura: Dónal decided that actually worked better, so I'll be sticking with that.
_____________________

Teaching Notes: The main points to remind people on the first part are just using three fingers to increase the range and pulling that arm across. On the second part, a lot of people weren't bringing their knees up high enough and/or squeezing them sufficiently together to create that vice on the arm. If their arm has any space to wriggle, it will, making it much harder to apply to submission because they can relieve the pressure.

If I ever find myself in a position where I'm teaching more often, I could add in some more submissions in that series. Shifting to an s-mount set-up for the armbar makes sense, as would a triangle. Although neither submission appeals to me personally, as I hate risking the loss of position, they're still worth teaching. However, with my current teaching schedule, I don't need to as I have enough lessons to work on already. :)

Still, I remain happy with the technical combination, so I'll be continuing to work it for the foreseeable future. I didn't get much of a chance to spar tonight, except a brief bit of king of the hill at the end. Escaping I initially tried for the usual heel drag, then ended up doing the hail mary pushing feet into armpits. Surprisingly that did work, but only because my partner was just as small as me so I could slowly squirm out the back. Not something to be relied upon though.

28 July 2013

Equipment Review - 'Jessica' Unicorn Spats/Tights (Pony Club Grappling Gear)

Short Review: For lovers of colourful kitsch, there is little on the nogi equipment market to rival Pony Club Grappling Gear's spectacular 'Jessica' spats, featuring a Meerkatsu designed pair of unicorns complete with a rainbow. The material is tough but smooth: it's also both tight and stretchy, so be aware the sizing differs as a result. Compression legwear is a considerable change if you're used to training in a rashguard and shorts/gi trousers, but after a few weeks of rolling in the Jessica unicorn tights, I've been converted. The Jessica is available to buy (while stocks last) here, for $65. For a slightly lower $50, you can plump for the less flashy Yang and Bader spats.

Full Review: Among the things I love, three rank highly: '80s music, '80s cartoons and grappling. Pony Club Grappling Gear, as you can probably tell from the name, manage to combine all three with their fabulously kitschy artwork. I've stuck the PCGG patch on my BJJ-patchified hoody and have been proudly wearing the t-shirt for several months. However, despite the fantastically bright logo, the PCGG t-shirts are currently available in the 'safe' colours of black, grey and white. It's an understandable move for a new company, but I was therefore very excited about the distinctly not-grey 'Jessica' grappling tights.

The company was founded in Australia by Reem Fekri, who late last year earned her BJJ blue belt there, under Eduardo Dias and Ricardo Franca at Garra BJJ. Fekri studied at several universities in the UK and has a background in art and journalism, which no doubt served her well when both deciding on the design ethos and promoting Pony Club Grappling Gear. It might also explain neat little details, like the quote running along the waistband of the tights. Fekri is currently based in Dubai.

If you're wondering why these tights are called 'the Jessica', that's due to one of Pony Club Grappling Gear's sponsored fighters, Jessica Penne. It's a naming convention that can be seen throughout Pony Club Grappling Gear's product range. For example, the original 'Yang' tights were named after Seymour Yang, the artist responsible for their look, while the 'JJ' shirts come from another sponsored fighter, JJ Ambrose. It is an endearing personal touch that reflects Fekri's friendly personality and PCGG's community vibe. ;)

These are the first grappling tights I've either worn or reviewed, meaning I can't help doing some research into their history (to skip my waffling on that topic and get to the discussion of the Jessica tights, click here). In an effort to find the earliest mention of 'compression leggings' on the net, I limited the search to between 1980 and 1995. That brings up two results, both medical. The first, a pdf from the NHS, has been updated multiple times. It states - under the heading of 'Caesarean section' - that "compression leggings or boots, should be fitted to all women."

There are various other medical discussions of compression tights post-1995, remarking on their alleged health benefits. There is a piece on MayoClinic.com about how compression tights can alleviate deep vein thrombosis. I am sure they don't mean the kind of tights you'd see in grappling, but the principle that "pressure helps reduce the chances that your blood will pool and clot" sounds reasonable (I know there is at least one qualified medical practitioner potentially reading this, so feel free to chip in if you have any thoughts ;D).

Daylong.co.uk goes into further depth about a variety of conditions that it claims compression gear can combat. Reassuringly, there is a list of sources at the bottom of the article, but not being scientifically trained, I can't vouch for their legitimacy:

- Research in flight attendants showed that wearing light level support stockings and tights resulted in a significant reduction in tired, aching legs with discomfort and swelling also reduced.

- Several studies have shown that wearing correctly fitted compression garments does prevent post-thrombotic syndrome, a serious and sometimes life-threatening complication of deep vein thrombosis.

- Professionally manufactured compression garments, made to prescription, have been shown to reduce healing time in leg ulcers.

- In cases of serious injury, such as spinal cord injury, where patients are unable to move their legs, using medical grade compression garments helps to keep the leg veins in better condition, reducing the risk of deep vein thrombosis.

- Compression, prescribed as part of complex decongestive therapy for lymphoedema has been shown to reduce pain and swelling and increase the use of the hands and fingers

More recently, you can see articles about tights in the context of sport, such as basketball. The activities I would normally think of with regards to tight leggings would be cycling and athletics. I could see quite a few tights on show in the Olympics coverage last year. Indeed, RunnersWorld talked about it in 2005, stating that:

It's well known that tights can help you run warmer; now, some high-tech models may help you run better, too. This new generation of tights uses compression to support the major muscle groups, allowing them to function more efficiently and recover more quickly.

"It’s based on the science, or art, of kinesiotaping," says John Wilson of Wacoal Sports Science, makers of the CW-X tights. "It’s what athletic trainers have been doing for years to support athletes’ muscles, and in Japan [where the product originated] it’s evolved into an art form."

There is another sport (of sorts) which may be the progenitor: pro-wrestling. Looking around the web for old pictures of pro-wrestlers, you can see the legendary Frank Gotch (1878-1917) in leggings from a picture that apparently was taken shortly before his death. As pro-wrestling got increasingly flamboyant and based on spectacle, the costumes became ever more impressive, resulting in numerous examples of men in tights ranging across the colour spectrum. This floral number modelled by the future Governor of Minnesota on the June 1982 cover of Pro Wrestling Illustrated would not look out of place in a Pony Club Grappling Gear catalogue.

I would guess that the use of grappling tights in nogi and BJJ emerged from the strong connection between pro-wrestling and MMA in Japan (especially as Japan is name-checked in the RunnersWorld piece above as well), but that's just an assumption. From what I can google, it appears pro-wrestling took off in Japan during the '50s, thanks to Korean-born sumotori Mitsuhiro Momota, better known as Rikidozan. Based on these pictures, he was another fan of wearing tights.

A couple of decades later, Antonio Inoki (who famously kicked away at Muhammad Ali's legs in 1976) created 'New Japan Wrestling'. Nobuhiko Takada, who would cross over into the MMA world with PRIDE FC, debuted in Inoki's promotion back in 1980. Searching through PuroresuCentral.com, there were numerous tights afficionados at New Japan Wrestling, such as Mitsuharu Misawa and Toshiaki Kawada, who both also emerged in the early '80s.

The person who is probably the most famous proponent of tights for grappling comes from Japanese MMA: Shinya Aoki. His attire was presumably influenced by pro-wrestlers like Misawa and Kawada. The chaps from GiReviews.net point to a useful Aoki tights timeline. In that list, it appears Aoki started wearing his now trademark tights at PRIDE Bushido 12, an event held on the 26th August 2006.

Yet that timeline also notes that Aoki was not the first to wear them, as in an 
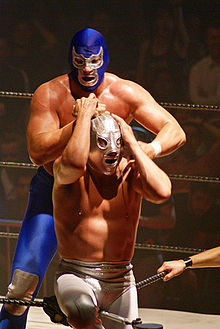
earlier Aoki fight on the 19th December 2004 at Smack Girl, Yuki Kondo was wearing a pair of black and red tights. This would make sense if I'm right in thinking that the use of tights came from Japanese pro-wrestlers shifting into MMA. Kondo was probably not the first grappler to pull on a pair of tights in an MMA fight either, given Japanese wrestlers had been wearing them since at least the '50s. Perhaps if MMA ever becomes popular in Mexico, lucha libre could act as a similar tights-tastic influence. :)

I did not see tights gain much traction in the UK grappling scene until Matt Benyon - at least partially inspired by Aoki, as far as I'm aware - started selling them, using the term 'spats'. He can probably lay claim to being the originator of that description in the UK, in the context of BJJ and nogi (most people would associate 'spats' with '20s gangsters from Chicago, so I'm not sure how it came to also mean 'grappling tights'). Other UK based fightwear companies - like Tatami Fightwear and Black Eagle, then more recently Strike Fightwear - followed suit. Grappling spats are now relatively easy to get hold of, although shorts remain the typical method for covering your legs in no gi.

The sizing of the 'Jessica' grappling tights/spats is potentially confusing if, like me, you're not used to wearing spats (well, aside from the occasional drunken night out at university in drag, but those tights would not hold up to sparring ;D). That's because Pony Club Grappling Gear tights will stretch a long way. I normally wear trousers that have a 30" waist, which I thought meant that the Medium size of grappling spats (29") would be the logical choice. The other sizes are Extra Small (23"), Small (26") and Large (32").

After emailing Reem, she suggested the Small rather than a Medium. The Small has turned out to be a good fit. The elasticated waistband does not slice into your flesh, though the spats are certainly snug on your legs. I'd suggest being careful as you pull them up over your ankles. Over-zealous yanking could strain the stitches. Slide it on gradually to be certain you aren't going to damage anything. It may be less of an issue if you're closer to PCGG HQ, but I'd rather not have to get a replacement pair shipped from Australia any time soon. ;)

I was worried all that stretching might leave the material weak, perhaps resulting in a rip, but so far the Jessica grappling tights have held up well in training. Up until now I have only noticed one potential sign of damage: there was a loose thread poking out by my knee. I didn't realise there could be loose threads by the knee, given that there isn't any stitching in that area. I'm still not entirely sure what that was, but it's simple enough to cut off. The stitching in general looks to be good quality.

Previously I have preferred to wear gi trousers for no gi grappling: I don't like having bare knees pressing into the mat. The Pony Club Grappling Gear 'Jessica' tights perform the same function. They're obviously not as protective as the thicker material of gi trousers, but thus far it's been enough of a barrier to prevent mat burn. That should also assist in reducing infections that require broken skin to develop (as from what I understand, cuts, mat burn and other abrasions help bacteria find a route to your bloodstream).

You might also expect the tights to ride up or down your legs, but those unicorns remained in place, with no movement from either my waist or ankles. I can therefore confirm there is no need to worry about the spats suddenly slipping and exposing areas you would rather keep hidden. That said, given how snug the PCGG spats are, it does not leave much to the imagination. For the more modest, you have the option of wearing shorts over the top, though having tested that sartorial option, it can get hot if the sun is out.

I found it more comfortable to train without the shorts over the top. The slipperiness of the spats helped in terms of escapes, especially as the first time I wore them it was around 32 degrees celsius, due to an insane heatwave the UK was having at the time. On the flipside, one of my training partners mentioned that they found it easier to escape my triangle attempts. Of course, my triangles are pretty bad anyway, but that's worth keeping in mind.

You could make an argument that if they do reduce friction once you get sweaty, that means your triangles are going to improve, as you'll have to get the technique that much tighter. I should also note that I am comparing this to wearing gi trousers. If you normally wear shorts, there won't be as much difference, as you'll be used to your legs getting similarly slippery.

Wearing them underneath gi trousers was a lot less sweaty than I expected. Although it was relatively hot that day, I never felt uncomfortably sticky, as often happens when I wear a rashguard under my gi jacket. In fact, quite the opposite: with the spats, I actually felt cooler. I also felt more fluid than usual, which I wasn't expecting. That could have just been psychological, but it felt like the spats enhanced my movement, particularly sliding through for guard passes and transitions.

I washed them at the usual 30 degrees celsius and air-dried, turning them inside-out first just in case the washing machine had any impact on the colour. The graphics are sublimated, which should remove the possibility of fading, cracking or peeling. The colours did not run, though I was only washing at a low temperature. Perhaps due to the moisture-wicking material, the Pony Club Grappling Gear tights were already fairly dry right after I took them out of the washing machine, ready for the mats a few hours later.

I didn't notice any shrinkage: measuring them without stretching them at all, the spats remained at 88cm long (69cm inseam), with a waist width of 31cm and ankle width of 10cm. If I yanked them between both hands, then I could without much pressure extend the length to 110cm, the waist to 45cm and the ankle cuffs to 18cm. If you really pushed it, I'm sure that would increase considerably, but I didn't want to risk damaging them.

Demonstrating the multi-purpose nature of the unicorn spats, I even tried going for a cycle in my Pony Club Grappling Gear tights, which worked pretty well for that purpose. Again it was a very hot day, but I felt cool and dry with the tights pulled up onto my legs: on top I was wearing my Fenom rashguard. The librarian probably thought I looked a bit odd, especially as I was wearing a pair of Doc Martens boots as well, but with impressive English reserve she didn't bat an eyelid. ;)

Initially it might be surprising to read (in this interview with Reem) that 80% of Pony Club Grappling Gear customers are male. However, that makes sense when you consider that the sports where you might wear grappling tights - MMA, BJJ, submission wrestling - unfortunately suffer from a massive gender imbalance. To make up some arbitrary figures, let's imagine 5% of the people in those sports are female. If only 15% of the remaining 95% are interested in Pony Club Grappling Gear, those men are still going to form the overwhelming majority of its customer base, even if every single female grappler buys some awesome unicorn spats. At least I think that works: I was always terrible at maths. ;)

A fellow '80s fan I know was very excited by the design: she suggested Thundercats would be good source material for the next one. Cheetara and Tygra spats and/or rashguard, maybe? Or perhaps Mysterious Cities of Gold with golden condors? Or best of all, She-Ra, which would be appropriate: not only was She-Ra a powerful warrior, she flew around on a rainbow-winged unicorn. I would definitely rock She-Ra Swift Wind spats. Make it happen, Reem! ;D

Comparing the cost, I can see other popular spats priced at $54, $59, $69 and $79, so Pony Club Grappling Gear's price of $65 (around £42 at current exchange rates) sounds fairly reasonable. Having said that, it would need to be shipped from Australia, regardless whether it is light enough to presumably qualify for a lower rate. The Jessica is available to buy (while stocks last) here, for $65. For a slightly lower $50, you can plump for the less flashy Yang and Bader spats.

28/07/2013 - Study Hall (Back Escapes)

Class #513
Gracie Barra Bristol, (BJJ), Study Hall, Bristol, UK - 28/07/2013

Back escapes have been a weak area for me for a long time, which is why I did two private lessons on them a while ago. However, I haven't been implementing one of the key points from those privates: I'm still clamming up and jamming my hands to my neck. Drilling should hopefully wean me off that habit, so I wanted to purely concentrate on back escape for today's study hall, with increasing levels of resistance.

The version I want to get good at is a tweaked bridging back escape. I've also begun incorporating that into my teaching of the back escape. My training partner today was Geraldine, who as ever proved to be very helpful in highlighting a few issues with my technique. We started off just drilling it light so I could get some reps in: initially I forgot to angle my knee to prevent them rolling, but remembered that later.

As we started upping the resistance in later rounds, the main problem that came to light wasn't my excessively defensive grip by my neck. Instead, it was preventing them bringing the leg over to take mount. I tried hooking the leg, but that either meant I lost my brace against being rolled the other way or it didn't seem to make much difference (meaning I'm clearly doing it wrong). Pinching my knees fare a little better but wasn't entirely reliable either. I briefly attempted shifting to deep half, but just got stuck under mount.

I'm pleased I've now got some well-defined areas I can keep practicing. Next time, I'll isolate the mount defence part, then build up the resistance on that. Back escapes could easily keep me busy for the foreseeable future, though I also want to make sure I'm drilling techniques that I'm due to teach the following week, along with whatever I've learned from the most recent private lesson.

I was also able to get in a bit of sparring at the end, starting with Dónal. He was going light, or I would have just been mercilessly crushed, but it was nevertheless a useful exercise in attempting to retain guard and transitioning between positions. We briefly ended up in 50/50, which I know for a fact was Dónal being playful: he knows I hate all the flashy stuff like that. ;)

My rolling finished up with Geraldine, where I looked to practice the ezequiel series from mount (although I didn't get to the ezequiel part, moving directly into the tight americana against the leg). I hopefully wasn't putting on too much pressure, but then as I know she's preparing for a competition in a couple of weeks, should be ok. She's more than capable of holding her own, of course: it's difficult to pin her down as she has good hip movement and escapes.

That injury I've had since September is STILL not entirely gone away, but I'm not sure whether it is paranoia on my part. I very much hope it's just me being paranoid, rather than a gradual slide into the same strain I had before. Bleh. To end on a positive note, these study hall classes continue to be a really cool addition to the schedule. Attendance was great today as well: it was good to everyone supporting the Sunday sessions. :)

24 July 2013

24/07/2013 - Dónal Private (Bit of Mount, Maintaining & Chokes from the Back)

Class #512 - Private #012
Gracie Barra Bristol, (BJJ), Dónal Carmody, Bristol, UK - 24/07/2013

I started off by asking about mount escapes, in case Dónal had any tweaks to add. I'm relatively clear on what I need to do when escaping mount, but I'm always looking to add more details or just different perspectives. Dónal had two suggestions: firstly, bump them with your knee to lighten their legs for the heel drag (a useful tip in general, which I think I initially heard in the context of half guard). There was a quick point from on top, where Dónal mentioned that to stop them getting on their side for the heel drag, Norby likes to put his body next to their head.

Secondly, if you're making a frame against their hips, turn your hand so it is palm towards the mat rather than pointing back towards you. Kesting recently had a video on that as well, where he suggests making a fist rather than open hand, in order to make it harder for them to knock your hand off and break the frame.

That didn't take very long, so for the rest of the hour we focused on the back. To being Dónal offered some suggestions for maintaining the back. They will be looking to escape by turning away from your choking arm, getting onto their side. To prevent them slipping free, tighten your hamstring by their choking arm side leg. You don't have to sit there tensing, as you're just looking to block them whenever you feel that leg try to move. If they are unable to bring that leg into action, then they'll struggle to both slide across and also use their foot to push off your heel.

If you can't get your seatbelt grip, dig your hand under their elbow on the non-choking side and pry it up, until you can slip that hand through. From here, you will often find they try to grab your choking hand. An effective way to break that hold is to put your non-choking hand on top of their same side forearm, palm up. Reach your choking hand to grasp your non-choking arm (you'll probably only manage a couple of fingers, but that is enough).

Bend your non-choking hand backwards, at the same time twisting your choking hand in the same direction, still holding on. This should be uncomfortable on their wrist. To finish extricating your arm, wriggle your non-choking wrist sideways into their arm, which should pop their hand out of the way. As soon as you knock it free, unclasp your hands and grab the meat part of their hand with your non-choking hand. From there you could push it down and step your leg over to trap it, or simply hold it in place with your hand.

You can now move into some attacks. Your first option is the short choke from last week, which you can do either grabbing onto their shoulder or holding the gi, then driving your shoulder into their head. Alternatively, there is Dónal's option, where the elbow is on their shoulder and you squeeze your arm together for the choke. A stronger option is the classic bow and arrow from the back. If you're still on your side, you need to get them upright: push on their choking side leg with your same side foot, shoving it forwards to bring them up off their side.

Don't make your initial grip on their collar too tight, or you'll lack the range to finish the choke. If they're got a GB gi on, you're gripping at roughly the 'G' from the ugly Gracie Barra patch along the jacket. Next you want to get hold of their non-choking side leg. With your same side heel, dig that by their knee and curl your leg back. That should bring their trouser leg in range for you to grab with your free hand, establishing a good anchor point.

Switch your non-choking side foot to hook around their far hip. That acts as a useful leverage point to swing your other leg out (you want to end up upright, rather than falling to one side). Your aim is to drop them into a space between your legs, rather than having them resting on your lap. Bring your choking elbow back to hide it near your hip. If you don't, they have a chance to reach back and pull on your elbow to try and escape. At this point, you will also probably need to release a few fingers, leaving you with two or three fingers. It ends up looking quite different to the version Roy Dean shows in the picture on the right, as Dónal doesn't extend his body like that or use the same grips.

That increases your range, but note that they will most likely attempt to grasp that hand and yank on it to remove your control. Two fingers gives more range, but feels weak on that situation: drilling, I felt more comfortable with three, especially if you imagine you're with a muscle-headed white belt looking to rip your hand off.

23 July 2013

23/07/2013 - Teaching (Escaping Mount to Butterfly & Escaping Technical Mount)

Teaching #115
Gracie Barra Bristol, (BJJ), Can Sönmez, Bristol, UK - 23/07/2013

I've covered the two basic escapes (upa and elbow escape) a number of times now, also incorporating my person favourite, the heel drag. While I think those should always remain the focus, I wanted to add in some other options for variety. The one that sprang to mind was moving from mount to butterfly. I started off with the bump and frame (that picture is made of screen caps from an old Rowan Cunningham vid, whose work I first saw right near the start of my training in 2006. They're now hosted at LearnBJJTechnique), a relatively basic technique. This isn't an option I often go for, but I do regularly use some of the principles, as quite often I'll end up trying to dig my knee through.

First of all you need to get their hips in range. It is more difficult to land this escape if they're still upright, although in that case you would probably go for something else. Knock them forward with a bump, pressing your knee into their back. As soon as they're horizontal, frame your arms into their hips and do a powerful bridge (heels as close to your bum as possible, pushing high, on your toes).

Stiff arm into both their hips, so that when you drop your hips back down, the space you created from your bridge is still there. Bring both your knees through that gap: having been balanced on your arms, they are now balanced on your shins. You can then kick forward with both legs, using the momentum to also sit up. This should put you directly into butterfly guard, where you can immediately sweep them.

If they are still upright, you can still do it sloppily by jamming as much of your knees as you can into the space you create. It ends up being one or one and a half knees, knocking them off to the side at best. Still, that can work too, and will almost certainly be better than staying stuck under mount. It can also potentially give you a chance at moving into x-guard or something like that, circling your outside around to press your foot into their hip. Tony's favoured double-shin sweep could work from here too.

That same principle of creating space then filling it with your knee can also apply to technical mount escapes. This is a technique I was first taught by Kev several years ago. The basic idea is wedging something under the leg that they've stepped over. It's possible to use your arm for this, especially if you want to go to deep half, but I prefer using my knee.

Grab their knee with both arms, keeping your elbows in to make it more difficult for them to strip your grips. You also want to be as much on your side as possible, curled inwards. Shove their leg towards your knee with your arms, shrimping into them to make space. As soon as there is any space, fill it with your knee, then spin to guard or simply try and knock them off-balance to escape (though that can end up becoming a scramble: either way, tends to be better than being stuck under mount).

You can try doing this with one hand, such as if they manage to strip one of your grips, but it's more difficult. As always, be aware of chokes: you may need to disengage one of your hands to defend your neck. Like side control escapes, be careful they don't immediately pass as you try and knock them off with the butterfly hook. Finally, they may be able to scupper your escape completely before you get started if they grab lower on the leg you're trying to use to insert your knee.

Should they mess up your grips or otherwise prevent you getting the knee through, you could try Saulo's technical mount escape, as seen both in his book and BJJ Library. Saulo stiff arms with one arm, the other staying back to help defend the neck. Having bent their leg outwards, he then simply sits up at an angle. Keep in mind that if you're not paying attention you could end up on your side in their guard, at risk of having your back taken. Therefore make sure you move to good posture before they can put you in a awkward position.
_____________________

Teaching Notes: The two main points that probably need emphasising, judging by drilling today, is firstly not lifting with the arms: they should just be there as a frame to hold someone in place after you've already lifted them with your legs and hips. The second thing is making sure that initial bridge is as powerful as possible by bringing your heels right to your bum and pushing up off your toes.

On the technical mount escape, I didn't mention the shrimp enough, so that's another part I'll highlight next time. I'm not sure if having the Saulo escape as well was too much for one class, so in future I might move the Saulo option to a pure technical mount escape class. I could combine it with Geeza's method, where you switch to deep half.

Like last week, Mike came down early to get in thirty minutes of drilling. It was particularly relaxed today, which is cool: we just worked on some light resistance to various guard positions, like the double shin sweep, as well as what to do when somebody is leading with their knee into your butterfly guard. It's a handy way of warming up a bit before class.

My groin was playing up yesterday again, which is annoying. I'm paranoid about it going again, especially as it isn't 100% from last September yet. I therefore decided to sit out of the sparring at the end, just in case. Hopefully the same injury isn't going to flare up again, though I at least know how to work around it now.

21 July 2013

Gi Review - Pro Series 2.0 (Flow Kimonos)

Short Review: This is a lightweight gi, with a 420gsm pearl weave jacket and ripstop trousers. Though there are a few patches and some embroidered text (attractively combining yellow, white and grey), in general the Pro Series 2.0 is a relatively minimalist gi. Flow Kimonos have attempted to cater to a broader range of sizes, with L (tall) and H (heavy) options in addition to the standard A measurements (but only for certain sizes). The jacket is a little abrasive, but that may reduce with repeated washes. Available to buy here for $135 in white or black ($10 extra).

Full Review: Flow Kimonos are based in Boston, started by Jonathan Leung in January 2012. They have a stated mission to "do our best to leave this planet close to how we found it", reflected by how their interest in using organic cotton is highlighted on the site. They are also one of the very few companies investing in hemp gis. Although the Flow Kimonos hemp gi is not yet available, I'll be interested to see how it performs upon release, particularly as the currently advertised price is a little lower than their competitors. Flow Kimonos hemp belts are for sale, but use a hemp/cotton blend (by contrast to the gi: the statistics proudly proclaim the jacket and trousers will both be 100% hemp).

There are numerous other aims and mission statements on the 'about us' page, a level of detail which perhaps reflects the need for gi brands to mark themselves out from the increasingly saturated gi market (a recent topic of discussion in the BJJ online community, such as on reddit and LinkedIn). For at least the past decade, perhaps longer, gi companies have increasingly focused on fashion rather than function: the best example is Shoyoroll, who charge huge prices but appear to rely on limited batches with minor variations in colour and embroidery. There's nothing wrong with that if people are willing to buy their product, but it suggests an opportunity for gi companies willing to put more effort into other areas.

Flow Kimonos are positioning themselves as an ethical brand, with some similar sentiments on their website to brands like Datsusara and the Green Gi (who not coincidentally both sell hemp gis as well). Sustainability is emphasised, as interestingly is community service. This is something Fenom do very well, with open mats, seminars and competitions aimed at encouraging and supporting women. Tatami have also made significant contributions to charity events: for example, the GrappleThons were greatly enhanced by their support.

It's great to read Flow Kimonos are planning to get involved in the community as well, so I look forward to seeing what they come up with. This is what Leung had to say on that topic in an email:

We've donated a batch of hemp belts to support TCO's initial fund raising effort. Andy, FK'S cofounder, who is based out of LA now, is looking to hook up with a BJJ tournament circuit as a sponsor. He is also planning on supporting a women's traveling open mat group in south California.

As we start to make more money, we will be able to reinvest the profits into more and more community projects. We are also sponsoring lower belts to help them reach their goals. I feel like a lot of the higher belts are further along in their goals, so it's more important to help out the guys just starting out.

The Pro Series 2.0 is described by Flow Kimonos as their "flagship competition gi". The jacket is a fairly light 420gsm pearl weave, comparable to the Kingz Ripstop v1, but not at the levels of Gorilla (250gsm) or the Tatami Sub Zero (350gsm). The material felt somewhat abrasive (particularly compared to the soft Sub Zero) initially, which I could feel on my shoulder during some extended running escape drilling a few weeks ago, but that may lessen over time.

It's pre-shrunk, with Flow Kimonos promisingless than 2% shrinkage. From the two washes I've done at 30 degrees Celsius then air dried, that has so far proved to be true: there wasn't any noticeable shrinkage when air drying inside. I only noticed a difference when I intentionally hung the jacket in the sun (it's been hot for the UK: that day was around 30 degrees celsius), when the wingspan went from 152cm to 150cm, while the shoulder to the bottom of the jacket shifted from 76cm down to 73cm. The trousers stayed at 90cm: I didn't risk putting those outside, as that's my ideal length for trousers.

Flow Kimonos also say that the fabric is both antimicrobial and anti-odour. As with similar claims from Datsusara and Gimono for their products, that is difficult for me to verify without a laboratory and a science degree. It didn't smell much after training, but to my layman nose I couldn't say it was any more or less pungent than other gis I've worn after a sweaty rolling session.

Minimal design is another stated aim. Generally speaking that's borne out by the Pro Series 2.0, though my personal standards of 'minimal' are extreme. For my taste, I'd prefer there wasn't any text on the gi, leaving just the attractive yellow and grey Flow Kimonos logo (like Datsusara, Flow Kimonos apparently take inspiration from Japanese heraldry) on the sleeve and the trouser leg. A hefty chunk of text clutters the lower part of the jacket and the trousers, which is time-consuming to remove as it is embroidered rather than a patch. Still, that remains minimal by the standards of many other gis. It should also be noted that the quality of the embroidery looks high.

There is grey contrast stitching throughout the gi, along with grey tape lining the cuffs and inside lower jacket, along with grey piping on the side vents. The label near that vent reveals that this gi is made in China (it tends to be either China or Pakistan, though some US based companies are looking into local production). Armpits are reinforced with the usual rounded lozenge of fabric, with more material for the vents. Here Flow Kimonos have gone for a square of material rather than the triangular shape seen in some other gis. The collar is average sized, covered in ripstop.

The trousers are 8.5oz ripstop cotton, with the same grey contrast stitching. There are six belt loops, also grey, with a grey drawstring. Flow Kimonos buck the trend of rope drawstrings, which they had used for the Pro Series 1.0, deciding instead on a classic flat cotton drawstring for the Pro Series 2.0. If you want to replace that string, note that the diameter of the drawstring housing on the front of the trousers is marginally smaller than on other gis I own. Testing this, it was a tight squeeze to put in the thick rope drawstring from the Gorilla Hitman, though it does eventually fit if you're careful (which reminds me: make certain that if you're using the squashed coathanger method you don't leave any sharp edges, or with a smaller drawstring housing, it will catch).

The aforementioned large slab of embroidered text from the lower jacket of the gi is repeated at the bottom of the left trouser leg. There are also two patches on either side of the leg, featuring the logo and the text "Flow Kimonos" and "Pro Series" respectively. The trousers were comfortable and light, though as with many gi trousers, the extra layer of fabric meant to reinforce the knees only just covers the kneecap when you kneel on the floor.

If you have trouble finding a well fitting gi, then you'll be pleased to hear that Flow Kimonos offer a broader range of sizes than most companies, providing for both the taller and the heavier grappler (L and H sizes respectively). That means this gi purports to cater to somebody ranging from 5'3" and 130lbs all the way up to 6'3 and 245lbs. On my meagre 5'7 and 145lbs frame, the A1 was a decent fit.

For those who want something a bit heavier and slightly less minimal than the Sub Zero, the Flow Kimonos Pro Series 2.0 could be a good option. The company's ethical stance is also appealing, as long as they can back up their claimed willingness to "contribute to as many projects as possible." The Pro Series 2.0 is available to buy here for $135, in white or black ($10 extra). That's a little more than I would normally spend on a gi, but is comparable to the Tatami Sub Zero ($120) I reviewed last week.

21/07/2013 - Study Hall (Mount Escapes)

Class #511
Gracie Barra Bristol, (BJJ), Study Hall, Bristol, UK - 21/07/2013

Today I wanted to drill mount, mainly escapes but a bit of top as well (from the private earlier this week, though I didn't do much of that). That's because I'm teaching mount escapes next week, so wanted to have a play with the techniques to see if I could refine any details. I started off with the bump and frame to butterfly, a relatively basic technique. This isn't an option I often go for, but I do regularly use some of the principles, as per the drilling for some variations later on.

First of all you need to get their hips in range. It was difficult to land this escape if they're still upright, although in that case you would probably go for something else. Knock them forward with a bump and biffing them with your knee. As soon as they're horizontal, frame your arms into their hips and do a powerful bridge (heels as close to your bum as possible, pushing high, on your toes). Stiff arm into both their hips to keep them in the air long enough to bring both your knees through.

You can then kick forward with both legs, using the momentum to also sit up. This should put you directly into butterfly guard, where you can immediately sweep them. If they are still upright, you can sort of still do it sloppily by jamming as much of your knees as you can into the space you create. It ends up being one or one and a half knees, knocking them off to the side at best. Still, that can work too, and will almost certainly be better than staying stuck under mount.

Working on that same principle, I then wanted to do some drilling for technical mount escapes too. I think this particular technique is something I ended up doing naturally a while back, but I've also been taught it by Kev several years ago. The basic idea is wedging something under the leg that they've stepped over. I started off by grabbing it with both arms, shoving the leg forwards as I brought my knee into the space, then using that as a butterfly hook to knock them off.

You need to be careful that first they don't strip your grips (it is much harder to do with just one hand, but not impossible): keeping your elbows tight can help with that, but you also have to be aware of chokes. Secondly, be careful of them immediately passing as you try and knock them off with the butterfly hook. Thirdly, they may be able to scupper your escape completely if they grab lower on the leg you're trying to use to insert your knee before you get started.

Even if you only manage to get a bit of your knee under their leg, you might be able to switch into a sort of x-guard type thing by swinging the other leg around the outside to push on their hip. It looks like just the kind of position Mike would like, so quite possible he's studied something on the topic over at MGinAction: I'll have to ask him next time I see him.

If you get stuck, you could combine it with Saulo's technical mount escape. This isn't something I've tried much, as it feels risky, but I'm going to start drilling it more often as an alternative. Saulo stiff arms with one arm, the other staying back to help defend the neck. Having bent their leg outwards, he then simply sits up at an angle. I find that I end up in a vulnerable position inside their guard if I'm not careful of my pushing arm, as that can put you on your side asking to get your back taken. The principle works though, so just needs more drilling on my part to get used to it.

18 July 2013

18/07/2013 - No Gi (Side Control to Mount)

Class #510
Gracie Barra Bristol, (No-Gi), Miles Pearson, Bristol, UK - 18/07/2013

There was an impressive turn-out for the nogi class tonight, with thirteen hardy souls braving the heat. The ridiculous temperatures (for the UK) have continued, with upwards of 30 degree Celsius. Miles was covering some basic transitions from side control to mount, beginning with the Gracie Barra Fundamentals syllabus method. Get a secure gable grip and cross-face as normal, bringing your knees in tight. You're then going to try and slip under the near arm with your knee. The GB Fundamentals version involves turning your knees towards their legs, then shifting back to dig under their elbow with the outside of your nearest knee.

You're then going to walk your far hand up past their head, creeping up the mat with your fingers until their arm is squished by their face. If you can, put your head next to it as well for additional control and the potential of switching to a head and arm triangle. Having dealt with the near arm, you should be able to get your hips high up by their head. That gives you loads of room to slide your knee over. To go to mount, drive that knee up into their far armpit, to avoid giving them a chance to snatch half guard.

The second version starts the same, except this time you switch your hips towards their head to get that near arm. The idea is to scoop it up with your hip, grabbing their far shoulder and pulling yourself up their body if necessary. You then twist them up like before, but instead of driving your knee into the armpit, drive it to their hip and push back. That should give you the space to 'fishtail' (turning your body and slapping your lower leg to the mat), after which you immediately bring your leg into their armpit for control.

no gi essentials roy deanMy main goal for sparring was continuing to work on my nogi grips, following my own advice to focus on small components of techniques. I had another watch of the 'Essential Grips' section from Roy Dean's excellent No Gi Essentials (Black Belt Requirements is coming soon: I'm looking forward to reviewing it!). He shows the same shoulder grip I've seen from Levo and the Carlos Machado butterfly sweep DVD, which I still have trouble landing. It feels like something that needs to be set-up, as a second option based on their attempt to escape something else, rather than a grip I should be going for initially.

I also tried Dean's suggested wrist and elbow control, but had real trouble getting any kind of purchase on their arm. The humidity certainly didn't help with that, but Dean repeatedly stated how good a grip it was, so I don't plan to give up on it just yet. The most successful grip for me tonight was the armpits. That was generally from reaching around their back and hooking my hand into the far armpit, but I managed to somehow anchor myself on Mike's armpit to avoid getting swept and instead take mount at one point (though I'm pretty sure he swept me later, as Mike's x-guard is tough to stop ;D).

Once in mount I wanted to try Dónal's ezequiel series from yesterday. The ezequiel isn't really workable in nogi (though I have heard of people using it: I guess they have weird arms?), but the tight, high-mount americana remains viable, as does the back take. I started with the americana, which Mike avoided because I couldn't get him squashed enough. I transitioned to the back take, grabbing the wrist (only just though, as Mike was wise to it and defending), but nothing came of it.

I went for the same back take with Roli, attempting to switch into the short choke from Dónal's series. I probably over-focused on it, as the rear naked choke was likely there too. I briefly went to Kesting's palm-to-palm grip to secure my arm behind the back, but wasn't able to maintain the back long enough. I squeezed briefly, but I don't think there was anything there so didn't push it (like I was saying on reddit recently, I subscribe to Cane Prevost's 70% approach). On the plus side, I landed the Akins sweep, which is fun: so, that therefore works in nogi too (although I didn't pull him forward first, which makes the sweep easier). :)

There was also a load of specific sparring from side control earlier, where I was trying for the running escape, but wasn't able to get their arms out of the way to move into position. I was able to lock on a triangle from under side control, but not tight enough and I also failed to isolate the other arm for an attack. On top, I did the usual maintaining, while hunting for the same Roy Dean lockflow. I tried it on Mike, but wasn't able to clamp his arm sufficiently when switching through the three attacks. I think I also need to prepare the ground better, putting my hand in place to move directly into the submission, as well as more use of my head to control the arm. That kind of tightness is much harder in nogi, but that difficulty also means it is a great way to refine your control.

17 July 2013

17/07/2013 - Dónal Private: Ezequiel from Mount Series

Class #509 - Private #011
Gracie Barra Bristol, (BJJ), Dónal Carmody, Bristol, UK - 17/07/2013

The reason I started taking privates from Dónal was to cover off lots of the techniques I already know, adding in tweaks and refinements from Dónal. With another five or so more lessons, I'll have covered off the bulk of what I had originally planned, especially now that we have a drilling class on Sundays.

Today I wanted to look into attacking from mount. I feel relatively comfortable maintaining the position, particularly in low mount, but I struggle to get any kind of submissions from there. The main two I attempt are the ezequiel choke (which I've taught once before) and the americana, so that's what I wanted to focus on today. The main thing I like about the ezequiel choke is that you can do it from what I think is the strongest controlling mount, where you're low with your feet tucked under their bum and an arm under their head. The difficulty I tend to have is getting my choking hand through, as they can normally see what is happening and block it, or are simply staying too tight and defensive in the first place.

Dónal's solution was going for that ezequiel choke (sometimes also spelled ezekiel) as soon as you land in mount (a quick point on that: bring your head further out towards your basing arm to increase your top pressure). When your arm goes under their head, block their view with your own head, keeping three fingers extended on the reaching under hand. Those are going to shoot inside your other sleeve: because you're only using three fingers rather than four, you've increased your reach. Bring your sleeve arm through across their neck, then pull your three-finger hand elbow across as well (a tip from Caio Terra, apparently). From there, complete the choke as usual, doing a motion like you're attempting to decapitate them.

If as often happens they block your hand coming across, you can flow into the americana. In order to block, they will tend to cover by their jaw with their opposite hand. To do that, they will invariably raise their elbow. That's you chance to shove your knee into that space. Usually I slide up, to stay tight. Dónal does it differently: rather than sliding, go slightly on your toes, then drive your knee and hip straight in. This is faster and more powerful. Keep driving your knee inwards to really squash their arm into their face.

Your other leg also shoots up, putting their other arm in a similar position. This is very uncomfortable and doesn't leave them with many options. A common last-ditch escape they might try is bringing their legs right up into your armpits. If they try that, drop your shoulder, which should help unless they're incredibly flexible.

Due to the way their arms are tangled up, you may be able to get a wristlock (especially if their hand is bent into the mat at an awkward angle: just apply gradual pressure to their elbow), or an americana. Dónal normally does the typical paintbrush from here, but because of the position, I bent it against my leg instead, more like a kimura: Dónal decided that actually worked better, so we stuck with that.

Should that not work either, Dónal had a third option, taking the back. Their elbow will probably be up high, so you can push it with your arm, then bring your body around to press your ribs against their arm. Coming up on your toes and giving them a little room to rotate, roll them in the direction of the other arm, reaching under their neck to grab their opposite wrist.

This is the same as the gift-wrap, but you don't want to be too tight. That's because your other arm is going to go under their elbow, with the intention of grabbing next to your other hand. If you need to, raise up your elbow to create the space and angle. If it isn't already, bring your knee up by their head, then push forward with both hands, then use the momentum to roll backwards over your knee. Secure the back, then immediately go for what's called the short choke.

I've seen of version of this taught before. I first saw it on Demian Maia's DVD, then later got some additional tips at the second Leverage Submission Grappling seminar I attended a few months ago. Move your initial grip to their shoulder, digging under their chin to get your forearm tight into their neck: make sure your other grip keeps control of their arm. You might also want to try and control their other arm with your same side leg, if you're finding they are able get that arm in the way of your choke entry.

To finish, the method I use is anchoring my hand on the shoulder, then driving my own shoulder into the back of their head as I expand my chest, as if I was trying to touch their other shoulder. Dónal's method is slightly different, as he brings the elbow of his choking arm back, so it is towards their same side shoulder, then squeeze his arm for the choke. They both work. :)

16 July 2013

16/07/2013 - Teaching (Side Control Basic Maintenance)

Teaching #114
Gracie Barra Bristol, (BJJ), Can Sönmez, Bristol, UK - 16/07/2013

GB Bristol hosted its 5th submission only competition last weekend, which I think is currently the sole sub only comp in the UK with no time limits. It is free to enter for GB and RGA affiliates, meaning it's also a good chance to catch up with some friends from around the country, like Rob T across the border at Chris Rees Academy and Tanya from Exeter BJJ. I was helping with admin again, which this time round was much smoother due to a new system Geeza used, where the weight divisions become the absolute rather than separating the two. The event was also far quicker, finishing around 3pm, but I suspect that was at least partially due to the intense heat we've been having in the UK recently.
_____________________

I went back to the basics of maintaining side control tonight. I kicked off with the conceptual framework John described to me in Texas, which I've mentioned before: the primary control points are the hips and the triangle of shoulders and head, secondary control is inside the knees and elbows, then finally tertiary control relates to the wrists and ankles. John goes into more detail over on this thread. I think it's helpful to have that framework at the start, as then the students can hopefully see how that principle filters through everything we'll be training today.

Another key point to keep in mind is that when you're underneath, one of the worst things that can happen is they control your near arm. Now you're on top, you therefore want to get control of that arm. Dig your knee into the armpit, aiming to slip it right under, bringing your knees in close to their head to trap their arm. You can also try switching to scarf hold briefly, scooping their arm up with your hip, then switching back to side control.

Next, you want to apply the cross face. If you're not familiar with the term, that means bringing your near side arm under their head: I like to reach right to their far armpit and anchor my arm there, either by cupping, or by getting a hold of the gi material. From that position, you can then drive your shoulder and/or arm into the side of their head or neck, aiming to get their head to turn away from you and/or generate some choking pressure to distract them.

If they can't turn their head back towards you due to the shoulder pressure, it will make it much harder for them to create space and escape. "The body follows the head" or "where the head goes, the body follows" is an old adage and a true one. This is what SBG call the 'shoulder of justice.' If you shift your shoulder from their face to their neck, that choking pressure can also open up opportunities to switch to mount or consider initiating a submission attempt. However, it does mean they can probably turn their head again, which improves their escape opportunities.

Either way, you've got control of their near arm and their head. You're now going to deal with their far arm. Reach under that far elbow with your arm, coming under the armpit. You have a couple of options here. Option one is linking your hands together with a gable grip and sucking them in towards you, providing a very tight side control. This is how Tran showed it to me several years ago, and has been my preferred control ever since. Option two is gripping around their shoulder, to bring their shoulder off the mat: this is something Dónal likes to do, which isn't surprising as I think I first saw that on a Braulio video. You can also use the elbow of your far arm to squeeze into their far hip. This latter option makes more sense if you're already grabbing by their armpit with your near arm.

You want to keep control over their far arm for two reasons: first, they can use it to defend, by getting it into your neck. Second, there are a number of attacks you can do from here. Final point I wanted to emphasise was chest position. Picture an imaginary line between the middle of their chest and also between yours. You want to bisect those lines: don't be too far over them, or they can easily roll you (if they DO try and roll you and it's working, put your far arm or your forehead out for base). Too far back, and it's easier for them to slip out and escape. Stay low, dropping your hips: don't leave them any space.

This is what I would call orthodox side control, which is what I started out using before I switched to the armpit grab. The reason I liked this position is because I felt like I had a lot of control, as my opponent has no space. It remains a good position, especially for beginners who want a 'safe' place on top of side control. If you do use that knees in position, clasping your hands in what Xande calls the 'super hold' on his DVD makes for a powerful grip.

At this point, I wanted to note that there are a bunch of different things you can do with your legs. I used to prefer to bring both knees in tight, but more recently I've been sprawling the leg nearer the head back. Either way, you need to keep your hips low. If your knees are in tight, widen them if your hips are still high. With the sprawled back position, lowering your hips is easier. The lower the hips, the more weight on top of them, which therefore gives you better control. However, if you have both legs sprawled back, there is a chance they might be able to bring their knee inside: you need to block it somehow, which would commonly be with the hip nearest their legs, your hand or your knee. Play around and see which position you like, and also be ready to switch depending on your partner's movement

That leads into the second section, where I wanted to emphasise mobility in side control as well as focused pressure. Although it can be tempting to just seize up in side control, you have to keep moving: otherwise, you aren't reacting to your opponent and they're eventually going to escape. The old "it's better to bend than to break" cliche comes to mind.

That transitional, mobile element to side control can be seen in Saulo's method for maintaining side control, which he shows on Jiu Jitsu Revolution. He keeps his hip stuck right by theirs throughout. The only time he lets off the pressure is if he gets something better, like strong control on the far arm. As they move, turn and put your other hip to theirs, following them around with your legs sprawled back. Your elbow is across, blocking their other hip: however, be careful of pinching that in too forcefully, as that may help them initiate an escape where they roll you over the top.

Your weight should constantly be on them, because of that sprawl: don't touch the floor with your legs or knees. You can also reverse, which Saulo's brother Xande discusses in detail on his DVD. Turn your hips in the other direction, so that you're now facing their legs. Control their far arm, also making sure to block their near hip to prevent their movement in that direction.

To continue emphasising the importance of that hip connection, I then brought in the drills I first taught a while ago, with sparring from side control without using your arms, then another round where the bottom person can use their arms but the top person still can't. My intention was to help students improve their sensitivity and weight distribution, both on top and on the bottom. That progresses into general specific sparring.

_____________________

Teaching Notes: I think my teaching structure slipped a bit tonight, perhaps because I'm being too complacent about reviewing my notes for this lesson because it's one of my favourite positions. I need to make sure I don't forget about the point regarding not bringing your chest too far over. When it comes to the no-arm sparring drills, I also forgot to remind people that they can use their arms if they are about to fall flat on their face. I wouldn't want anyone to injure themselves as a result of headbutting the floor! ;)

I was able to get in a bit of sparring myself, which is good, mainly in the no-arm drilling section. On top I'm quite comfortable. That also reminds me of another point I should make before people start that drill: your head becomes a very useful controlling point, in lieu of your limbs. Underneath I found it much tougher, but it was a good opportunity to practice bridging.

My groin injury isn't giving me too much trouble at the moment: tonight was the first lesson since last September where I joined in with everything, including all the stretches. My left groin did feel a little sore the next day, but I'm hoping that's just due to not being used properly for a while. I'll see how it goes for the rest of the week.

Before class tonight, Mike popped over early to get in some drilling. He wanted to work on his single leg x-guard (for a discussion of that, check out Jiu Jitsu Lab, which is where I got the picture from), which gave me an excuse to go look at the x-guard passes from that Lucas Lepri DVD I reviewed for Jiu Jitsu Style earlier this year. We spent about thirty minutes working on Mike's single leg x guard control and sweeps. From what I gather, the important thing was preventing their ability to twist their knee inwards as well as getting their leg up onto your shoulder and clamping it there. Mike goes for that a lot in sparring, so I've become increasingly wary of letting him get my foot. ;)

On top, I wasn't getting too much of a chance to try the Lepri passes, as those are for normal x-guard rather than single leg, but some of the principles applied. The first pass starts by grabbing the leg furthest in front of you with your near arm and pushing down, twisting to get the knee of your trapped leg onto their chest. You then lean towards their head and post on your arm, finishing by kicking you rear leg and backstepping through to side control. The second pass has some similarities, except this time you grab the leg hooking underneath with both hands, bring your hips back then thrust them into the leg, before doing another backstep. That second one doesn't seem to apply so well against the single leg x-guard, but the first one vaguely worked.

Main points I learned against single leg x-guard was knocking off the foot by your hip as soon as possible, avoid them putting your leg up on their shoulder, crouch low (don't kneel, that makes it easier for them to sweep you) and get your knee onto their chest. Hopefully it was useful for Mike too: certainly a good workout for my base and balance!