Artemis BJJ (MYGYM Bristol), Can Sönmez, Bristol, UK - 04/05/2016
 The back is a great position to be in. There are lots of submissions, your opponent can't easily see what you're doing, and you'll also get four points in competition (once you've got your hooks in). The first thing to note is a basic safety point, which is don't cross your feet. If you cross your feet, then all your partner has to do is cross their feet over yours and bridge, footlocking you. Instead, you want to be hooking your insteps inside their legs, or digging your heels in. The idea is to generate enough connection with your feet that when your partner rolls to one side, you will roll with them.
Second, you want to get a good grip with your arms. The harness grip (as always, various other names, like over-under and seatbelt) is a solid option for both gi and nogi. Begin by getting an arm under their same side armpit, so they can't slide down (as otherwise they can go for the scoop escape). If they have a gi, you can help secure the position by grabbing their opposite collar. The other arm comes over their shoulder.
If you can't grab a collar, then link your hands together, using that to lock yourself in place. You could also grab under both arms grabbing a collar, which is a excellent way to hold them in place. However, that means both your arms are occupied: for attacks, you have more options if you keep one arm free, to go over the shoulder.
Your arm by the shoulder is the one you'll be looking to shift into their neck and/or grabbing a collar, where you can start working for a choke. Stephan Kesting advises that rather than linking hands, you can grab your own arm, which in turn means you are blocking the best grip your opponent wants to get. As ever, play around and see what you prefer.
Third, keep your chest pressed against their upper back. To escape, they need to create space, so don't let them have any: stay glued to their upper back. You also don't want them to put you flat on your back, like in the bridge escape we saw last week, as then they can start moving their hips. If you drop back, make sure you've moved to the side. However, your ideal position is getting them face down.
Fourth, follow them with your hips, similar as when you're in their guard. If you keep moving your hips to square back up whenever they try and shift away, that again stops them creating space.
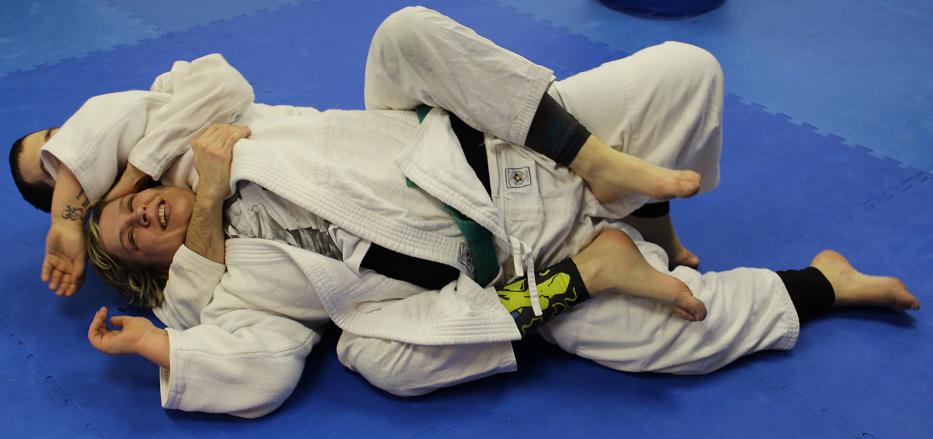
Finally, you want to keep your head locked to theirs, providing additional control. It also helps you to see what they're doing. Otherwise, their head would be blocking your line of sight. Place your head next to theirs on the armpit hand side, as that way you're controlling both sides of their skull.
In terms of turtle, the side ride is a good basic option on top. You are alongside them, with your nearest knee on their thigh, your other leg out for base (but bent, as if it's straight, that hinders your ability to react to their movement). Your same side hand is grabbing their near arm, while your other hand is reaching inside their far hip.
Don't go too deep, just to the level of your wrist, also being careful to keep your elbow out of range: if they can grab your elbow, they can roll you over. To maximise your pressure, keep your head low. I'd also advise keeping your knee off the floor and leaning into them.
You can also move around directly behind them, legs in tight rather than sprawled back (that can work too, but it does potentially provide them with some space to exploit). In that position, put both hands inside their thighs, your knees pressing into their hips, staying on your toes and keeping your weight low. From there, you can switch to the side ride on either side. If they manage to start turning in either direction, always run behind them to their back. If you run towards their stomach as they turn, that can put you in their guard.
_____________________
Teaching Notes: I wanted to try adding some turtle maintenance to this lesson to bulk it out. I think it's useful to go through it, especially as I want to cover the crucifix later in the month, but I can probably get enough from adding it as a warm up drill rather than in the main class. It could be something to focus on more if I do a back take from the turtle? Those may combine well.
Next time for this lesson, I'll re-add the mount retake as they escape instead, as I think that will be more useful for beginners (supported by feedback I got when I asked one of the experienced students. Very handy to have that perspective! :D). Here is it for next time:
 I finished off with the simple way of recovering mount from the back. They've cleared one hook and managed to put their shoulders onto the mat. It will be tough to regain your back mount from here, especially if they've moved over your leg. As soon as you feel their bum move past your knee, bring your remaining hook over their body and clamp the heel to their far hip. Make sure it is providing you with enough control that they can't simply shrug you off. Pull out your elbow for base, then turn and slide through into mount, using your heel for leverage.
No comments:
Post a Comment