Teaching #666
Artemis BJJ (MYGYM Bristol), Can Sönmez, Bristol, UK - 22/05/2017
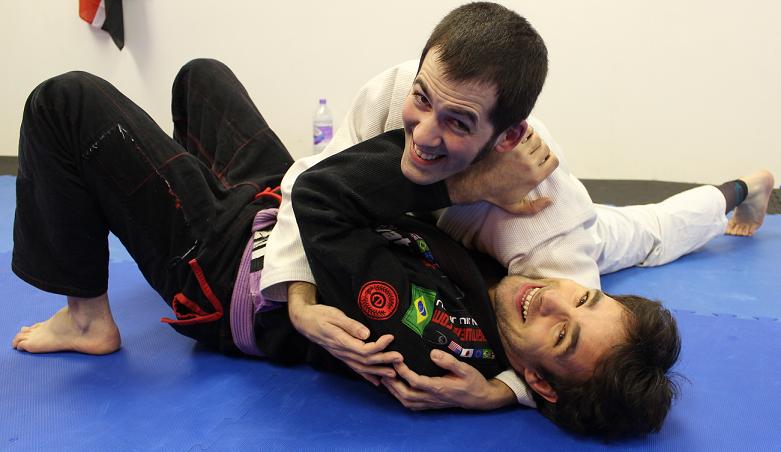
First thing to note is that they will want to kill your near arm. This is bad for you, because it means you can't stop them shifting up towards your head. From there, they can make as much space as they want and pass to mount.
So, you need to get your arm inside, the forearm pressing against their hip: this is more reliable than using your hand, as they can potentially still bring their body onto your hand and collapse it, especially if you're grabbing the gi (given the loose material). The forearm into the hip will help block their movement, and initiate your attempts to create some space. It should also help you block them moving to north south, as if you clamp your arm by their side, your body will move with them if they try to switch position.
Be aware that having your forearm by their hip like that does leave you more open to the cross-face. So, you could potentially block inside their cross-facing arm instead, which will prevent their shoulder pressure. This is the Saulo method from his
book, which has advantages, but personally I prefer to block the hip.
With your other hand, grab the gi material by their shoulder, close to their neck, then pull down. You're aiming to use the lower part of your forearm. Twist that arm up into their neck, keeping your elbow in: you need to be tight here, as otherwise they will go for a figure four on that arm. Once you've got the forearm into their neck, they can't press down into you, as they'll essentially be choking themselves. Note that this is a block: you don't want to start pushing and reaching, as that may leave you vulnerable. Reach too far and they can shove your arm to one side and set up an arm triangle.
Next I moved on to the legs. Your legs have two main purposes here: first, blocking your opponent getting to mount. Raise your near knee and drive it into their side. The idea is to wedge them between your knee and the arm you have by their hip. Personally, I like to keep my knee floating, glued to their side.
That makes it easier to slip my knee under as soon as they give me any space, which is something I learned
from Roger. Many people prefer to cross their foot over their knee, which is something I used to do in the past as well. However, as this
long Sherdog thread discusses, that can leave you open to a footlock, and also limit your mobility. Then again, you can see it used at the highest levels, like
here at the Mundials.
The second use for your legs is bridging. Marcelo Garcia has a
handy tip for this (although the escape he is doing there is slightly different), related to increasing the power of your bridge. To do that, bring your heels right to your bum, then push up on your toes. That increases your range of motion, so you can really drive into them.
Make sure you turn into them as you bridge, rather than just straight up. This will help the next part, which is to shrimp out as you come back down. That's why you've created space in the first place: if you simply plopped back down, then you've wasted the opportunity. As soon as you shrimp out, slip the knee pressing into their side underneath. Note you aren't trying to lift them with your arms. Instead, you want to push off them, moving your body away rather than pushing theirs higher up. When your shin is over their stomach, you can use that to square your body up, pushing through your leg to move your head in line with theirs.
Once your knee is through, you need to be careful they don't immediately pass by pushing down and moving around that knee, ruining all your hard work. Control their arm with your hip-bracing arm as you escape, like Roy Dean demonstrates in
Blue Belt Requirements. Bring your arm just above their elbow, reaching across to your opposite shoulder. That will stop them pushing down on your knee, as their arm is trapped. With your free arm, grab their head to control their posture
To get your knee out from under them, you'll be looking to shrimp in the direction you want your leg to go. Bring your leg over their back, on the side where you aren't controlling their arm. Get your other foot to mat, using the base you gain from that post to shrimp out. That should normally be enough to free the leg and get into closed guard.
If not, you'll need to keep shrimping (and you may need to keep both feet on the floor until you have shrimped far enough that you can comfortably get your legs out). Sometimes there isn't space, in which case you can push off the shin/knee you have pressed into their stomach/hip. Keep in mind that you also have the option of going to butterfly or some other open guard, if you are really struggling to get your legs out for closed guard.
_____________________
Teaching Notes: This is the class I'm most confident teaching, but I'm still trying to make changes. I added in more drills tonight, running through the straight up and down bridge, then at an angle, and finally bridge and mid-air shrimp. That's worth emphasising, lots of people don't bridge with purpose, meaning they can't make the space to escape. Get right on your head and shoulder, whacking your hips out as far as you can. I also included a brief drill where the person on top can use their arms, the person on bottom can't. I don't expect them to be able to escape easily, but the idea is to get them to really focus on the leg and hip movement.
Something to keep in mind is that getting that initial bridge and shrimp is still really hard, countering that top pressure. I'd like to come up with some kind of reliable trigger beyond just "bridge hard". Getting out of that heavy pressure is what makes the escape so difficult, and tough to initiate. I will keep thinking. :)